Get More Out of Your Google Shopping Campaigns in Q1


Well, Q4 isn’t entirely over, but so far it’s been a record-breaking year for ecommerce.
From 2014-15, we saw Thanksgiving, Black Friday, and Cyber Monday amassed the highest revenue jumps in Google Shopping–55 percent, 38 percent, and 24 percent year over year respectively.
Here’s what we saw this year on Google Shopping compared to Q4 2015:
Yes, you should prepare for a dip in sales on Google Shopping after the holidays. But it doesn’t mean people will stop shopping, especially in certain verticals.
Maybe it’s time to expect more from your Google Shopping campaigns in Q1 2017. Here’s how to prepare.
This is common sense–but it’s easy to get swept up in a new strategy without double checking last year’s performance.
 “Look at what you did Q1 last year before you make changes,” Roman Fitch, Retail Search Manager at CPC Strategy recommends. “Did you spend too much or too little? Did you leave money on the table? Plan your new strategy accordingly.”
We’ve said before that you should scale back and adjust your budget and bids after your final ship date, in anticipation of a drop in CVR and orders during Q1.
We’ve also said you don’t want to bid based off Black Friday/Cyber Monday data, which is totally true. However, this doesn’t mean you should drastically drop your bids or budget simply because that’s what’s recommended. Always look into the data and see which levers you can pull to optimize your conversions on individual products.
“It can be difficult to zone in on a Q1 shopping strategy,” says Fitch.
“Q4 is unique because Google typically releases new features on Google Shopping during Q3, then Q4 is when it all goes into effect. Additionally, everyone feels the crunch, even if they’re not seasonal because other sellers influence auctions and increase CPCs overall.”
However, there are a few types of products that will do especially well during early Q1. Hint: It has a lot to do with New Year’s resolutions.
“There’s not too much action on Shopping during January except for with apparel–particularly fitness products, shorts, and workout apparel. Those products tend to do well as shoppers reach their “new year, new me” phase,” says Fitch.
Is that actually true? Do people take resolutions to get fit seriously?
We decided to conduct a test on the Google Shopping Insights platform, starting with a search for the term “running shoes”:
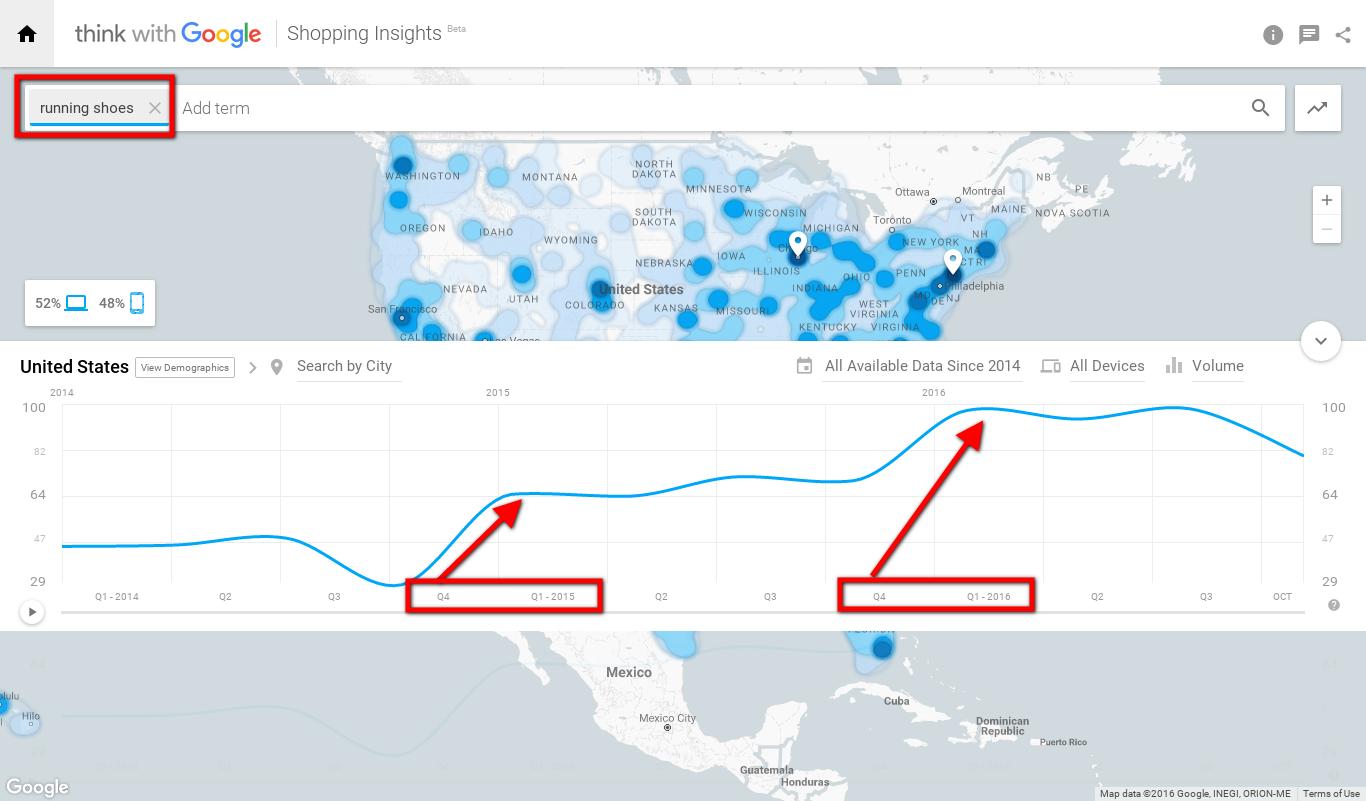
From Q4 2014 – Q1 2015, searches for the term “running shoes” went up by +124.13 percent. The following year, the number of searchers in general increased, and the term went up by another +38.57 percent.
Coincidence? Well just for fun, let’s try another one. How about a pre-workout supplement?

Check out those increases. From Q4 2014 to Q1 2015, there was a +61.11 percent increase in search buzz around this particular pre-workout product, and it grew even more steeply from Q4 2015 to Q1 2016, by +122.22%.
There’s just something about those health and fitness verticals paired with resolution season that keeps things running.
If you carry those types of products, capitalize on what will hopefully be lower CPCs in January, and you may reap the benefits.
However, the key here is not to rely on Google Shopping to carry your sales. Why?
Because it’s feed based, and you can’t include your brand’s creative messaging.
That’s where your other marketing efforts should supplement your Google Shopping efforts and drive traffic for more conversions (no pun intended).
“Leverage emails, text ads, extensions, or banners or ads on your site,” says Fitch. “Highlight that it’s the new year, and that customers can start it off right and stick to their resolution with the help of your product.”
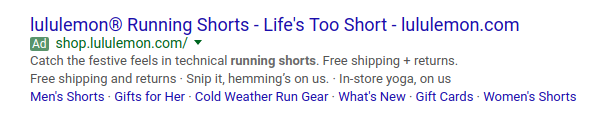
Fitch continues, “Text ads are really where you can start creating the messaging about what you want to highlight with people. If it’s the first week of January, and I’m looking for running shorts, I’m just going to see top brands on Google Shopping, so mid-size and smaller sellers could get lost.
With text ads, I can show up for the same people searching for running shorts, adjust my messaging, and offer a promo code ‘2017RESOLUTION’.”
Bonus–you can create Similar Audiences for search targeting based off browsers or buyers on your site from Q1 last year. Which brings us to the next point–Customer Match and RLSA for Shopping.
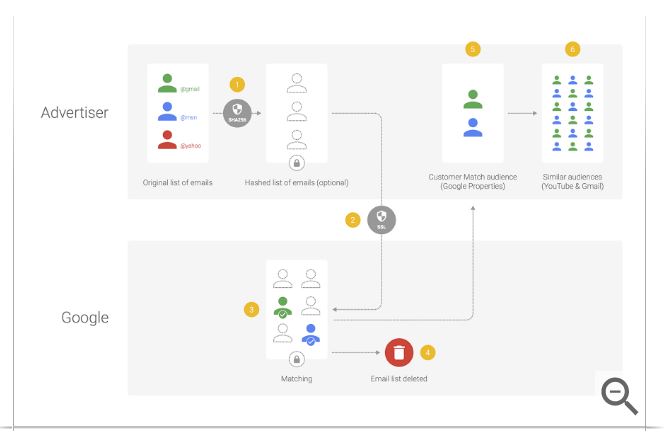
Last year, Customer Match for Search was introduced. This year, we got Customer Match for Shopping.
Basically, all you have to do is upload a list of email addresses into AdWords, and they are matched to signed-in users on Google. Then, you can create a remarketing list to reach these customers across all of your campaigns.
“Segment out people who purchased from you the year before using Customer Match for Shopping,” says Fitch. “If they show behavior-wise that they bought during this time, especial in the apparel space, bid more to get in front of them.”
RLSA for Shopping, which was intro’d in 2015, is another powerful tool you can use to retarget past purchasers with your Shopping ads.
“You can leverage RLSA for past purchasers as well as email lists,” says Fitch.
Learn more about optimizing RLSA (Shopping) campaigns here.
Oh, and one last thing, says Fitch.
“Make sure that your Shopping campaigns are opted into Search Partners, because Google has increased PLA placements across the web–we saw a huge shift last year when they started showing them on Youtube, Google Images, and more. It will really help increase your visibility.”
What are you doing to plan for success in Q1? Do you have a Google Shopping strategy you rely on every year, or do you change it up? Share with us in the comments!