Over 93% of marketers today use Facebook advertising regularly, making it one of the most popular advertising platforms for businesses of any stripe.
When it comes to Facebook advertising, one of the most powerful (and often misused) tools are Facebook Custom Audiences.
Here’s a rundown of how the different types of Facebook Custom Audiences work and how to best use each to improve your advertising performance.
“Custom audiences are a must-have tool for advertisers to target people who are already aware of the brand, meaning they are one step closer to a conversion.“

-Savannah Montgomery, Social Marketing Manager at CPC Strategy
What are Facebook Custom Audiences?
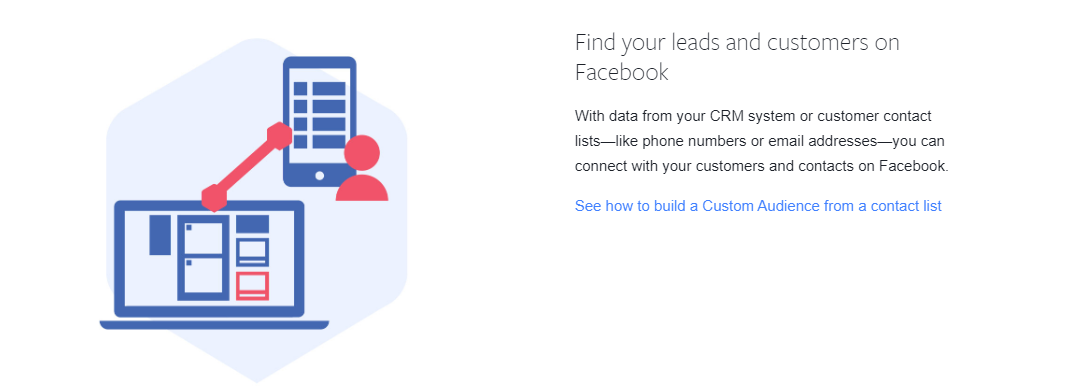
Custom Audiences enable you to target your existing customers based on your email lists, phone numbers, and Facebook engagement with highly relevant ads.
Advertisers can also build audiences from the people that visit their website or from people who use their mobile app.

Custom Audiences make it easy to target specific customers or prospects with ads that scale and drive cost-effective conversions.
Facebook Custom Audience Types
There are different types of Custom Audiences on Facebook that are designed to reach consumers based on a number of criteria and data points available.
Facebook will take this data nd match it against user information already garnered on their site. The expected match rate will vary depending on the data pulled from your uploaded list, but the higher the match rate, the more success you can expect to have.
Customer List
Customer lists are great for retargeting current customers to drive lower funnel conversions.
You can upload customer lists based on:
- Emails,
- Phone numbers
- Facebook IDs that you have gathered off of your website
You can upload the list manually or use a third party sync software to automatically upload it.
Once you’ve uploaded your list, Facebook will match your consumer info to users on Facebook, allowing you to target your ads to those users.
What makes Customer List audiences so advantageous is the fact that it eliminates the need for initial targeting setup.
In most campaigns, advertisers will need to establish specific demographics and other options. Mulling over the likes of customer interests or locations can be a tedious, but necessary, undertaking.
“One effective technique is to target your email list by uploading your list manually or integrating your CRM system to automatically sync new emails into Facebook,” says Montgomery.
This process becomes immediately simplified with the Customer List option in Custom Audiences on Facebook. Once a list has been generated, you have, not only an audience to advertise to, but an audience already familiar with your business.
You can use your customer list to drive customers to become fans of your Facebook page, or segmenting your lists in a number of other ways to achieve a variety of objectives.
“Segmenting your list as much as possible is really important when uploading any CRM information. Aim for a match rate between 70-80%. Instead of uploading information in one shot, I’d recommend segmenting as much as possible to develop a more refined list.”

-Sarah Sanchez, Manager of Performance Social at CPC Strategy
“Look at people who have made repeat purchases, non-purchasers, people whose information you have – such as an email address – that haven’t actually purchased from you,” explains Sanchez.
“Segmenting in all of these different ways will make your customer lists much more effective.”
Engagement
Engagement audiences are great if you’ve already gathered a decent amount of engagement through organic or paid means.
An engagement list is a custom audience composed of users who have engaged with your ads or Facebook page.
Once you’ve set your ad to target users who have engaged in a certain way, Facebook will create a targeted list of those consumers.
Website Custom Audiences (WCA)
Using the Facebook Pixel feature, you can track the actions of visitors on your website and then use this information to build a targeted audience.
This is one of the most valuable targeted audiences you can create because it allows you to track several different actions, such as if a visitor viewed a specific product or added something to their shopping cart.
“You want to ensure the Facebook pixel is set up properly on your website in order to build audiences based on site visitors, past purchasers, etc.,” explains Montgomery.
You can segment website visitors based on very specific behaviors and then create highly relevant ads based on those behaviors.
One of the most significant advantages of Facebook Pixel is that it’s not limited to solely tracking visits. With slight variations of the code, a pixel possesses the ability to track a variety of events that visitors take on your site.
Events include, but are not limited to, things like:
- If a specific piece of content has been viewed
- Products or keywords searched for
- Items that have been added to the cart
- Items that have been added to a wish list
- If the checkout process has been initiated, but not completed
- How far into the checkout process a user went, such as whether or not payment information was inputted
- If a registration form was completed
“Website Custom Audiences have come a long way. You can target very, very granularly now, allowing you to make your campaigns more powerful,” explains Sanchez.
“Website Custom Audiences are probably one of the most powerful tools on the platform. It informs you of people who know your brand, who have recently visited your site, and who has raised their hand expressing interest.”
“If you’re not using it, you’re missing out on a lot of advertising opportunities.”
App Activity
If you have an app, creating an App Activity audience can be a gold mine for your business.
19% of time spent on mobile devices is on Facebook, beating out all other mobile activity, so knowing what people do when on your app can give your ads greater reach.
Similar to Website Custom Audiences, ad targeting is generated based on actions and events users take within your app. If an individual has not used your app in a while or if someone added an item to the cart but did not make a purchase, you are able to target them with ads based on this information.
These target configurations allow you to reach relevant audiences with pertinent ads, instead of lumping the aggregate user base together.
Events businesses are able to keep track of include people who may have:
- Recently opened your app
- Recently completed a purchase
- Completed large purchases
- Abandoned carts
- Achieved a certain level in your game
Additionally, you are able to combine actions as well, permitting a much more refined and targeted audience.
Lookalike Audiences
Facebook’s Lookalike algorithm is one of the most powerful algorithms around and for good reason.
Once you’ve created any of the above custom audiences, you can then use Facebook to identify other users with similar demographics to create a much larger Facebook Lookalike audience you can market to.
Lookalike audiences are one of the most interesting options in Custom Audiences on Facebook, although, this audience type is not specific to Custom Audiences.
They allow advertisers to target consumers who mirror or look similar to former or already existing customers they may have.
After providing Facebook with several different kinds of user sets, they will look for patterns and characteristics in your current users, leads, or customers – such as age, gender, or interests – and determine what similarities they possess when compared to other users that have not interacted with your business in the past.
Lookalike audiences have become incredibly renowned amongst Facebook advertisers as it allows them to reach an entirely new group of prospective customers they may not have found otherwise.
In order to have a Lookalike audience made, businesses will need to have at least one source from the following:
- Mobile Apps (with App Events)
- Facebook Page
- Custom Audience
- Conversion Pixel
“With lookalike audiences, you can basically take a group of repeat purchasers and basically say, ‘I want to build a lookalike off of this custom audience,'” explains Sanchez.
“When setting it up, you have a range from 1-10%, 1 being the closest match and 10 being the furthest. 1% is typically about 2 million people and that’s the closest group Facebook can find resembling the behaviors of those repeat purchasers.”
“You want to build lookalike audiences off of your custom audiences to reach people who are likely interested in your brand,” says Montgomery.
Final Takeaway
Facebook Custom Audiences are a powerful targeting tool that allows you to match your existing customers data from multiple channels and match it against Facebook’s user database to create highly relevant campaigns.
1. Upload your existing customer emails manually or integrate your CRM with Facebook.
2. Segment your lists as much as possible when uploading any CRM information. Aim for a match rate between 70-80%.
3. Segment users based on engagements; repeat purchases, non-purchasers, etc.
4. Ensure the Facebook Pixel is set up properly on your website to build audiences based on site visitors, past purchasers, etc.
5. Build Lookalike audiences off of your best-performing custom audiences.
Want to learn more?
Facebook Ads Guide: Setup, Strategies And Tips From The Experts
The Best Facebook Pixel Guide for Advertisers in 2018
The Retailer’s Facebook Custom Audiences Cheat Sheet
How to See Your Competitors’ Facebook Ads
New Requirements for Facebook Custom Audiences + Expert Opinions
The Brand’s Guide To Creative Performance On Facebook & Instagram
You Might Be Interested In