Google recently announced that its new Responsive Display Ads (RDAs) will roll out to all advertisers in the “coming months.”
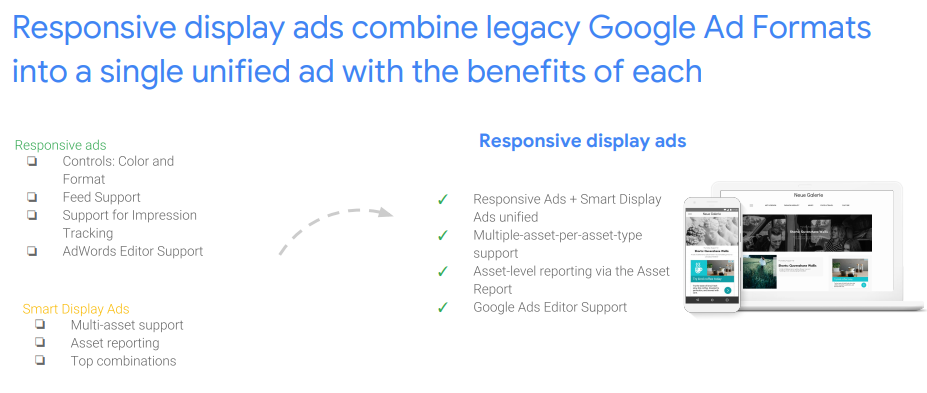
Powered by Google’s advances in machine learning, RDA’s save advertisers valuable time by allowing Google to automatically test different combinations of headlines, images, descriptions, and logos — and then display the best-performing combination.
Here’s everything you need to know about the new responsive display ads, how to set them up, and some best practices for leveraging them for your Google display campaigns.
“The ability to test multiple combinations of images, headlines, descriptions, and logos for a fully-optimized display ad is exciting. SMB advertisers with limited time and resources will find the new responsive displays ads an easier way to reach customers across the Google Display Network.“

–Josh Brisco, Manager, Retail Search Operations at CPC Strategy
What Are Responsive Display Ads (RDAs)?
Responsive Display Ads are Google’s new default ad format for Google’s Display Network that is powered by Google’s machine learning technology to test multiple inputs by advertisers and then optimize for the best-performing combination to display to an audience.

RDAs mark an improvement over the older responsive ads which impressed advertisers back in 2016 with the ability to “automatically adjust their size, appearance, and format to fit just about any available ad space.”

The Advantages of Responsive Display Ads
Much like the responsive search ads released earlier this year, Google’s new responsive display ads make full use of Google’s machine learning to save time for advertisers and help them test multiple inputs, and then optimize for the best ad based on performance.
1. They automatically optimize your inputs for more conversions
You only need to provide a few inputs, and then Google will automatically test different combinations to select the best-performing ad.
According to Google’s internal data, advertisers see “10% increased conversions on average at a similar CPA with multiple inputs versus a single set of assets.”
Advertisers can include up to:
- 15 images
- 5 headlines
- 5 descriptions
- 5 logos

2. Broader reach with adjustable sizes to fit more placements
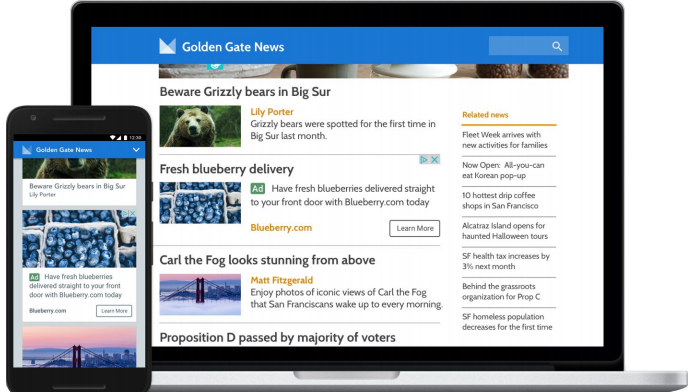
Responsive display ads automatically adjust their size and format to fit different ad placements across the web.
This means that your responsive display ad can display as a text ad within a mobile app while also appearing as a banner ad on a website.
“Automatically adjusting size and format means that the new responsive display ads have greater reach and more opportunities for conversions. The ability to serve ads across all formats opens territory that we previously couldn’t target.”

-Adam Harms, Senior Retail Search Manager at CPC Strategy
3. Saves you time
No more time-consuming A/B testing and managing multiple ads at campaign and ad group levels.
Advertisers can now focus on what matters: performance.
4. Can be used with dynamic remarketing
Responsive display ads can be included in your dynamic remarketing campaigns by attaching your feed. According to Google’s support page, these ads can display in dynamic and static formats by adding the feed to your campaign.
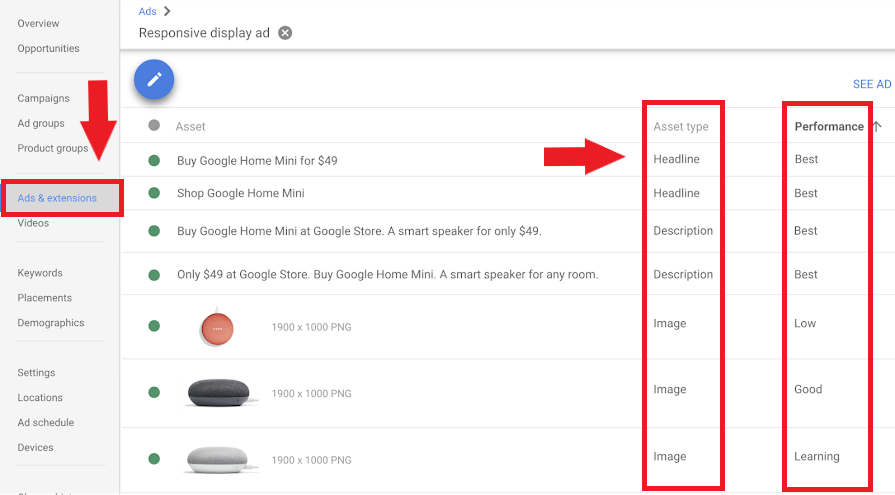
5. You can monitor the performance of each asset
If you want to know the performance of each of your assets (headlines, descriptions, images, etc.) you can view that data within the asset report in Google Ads.
- Click on Ads & extensions
- Then select View asset details
- Performance is ranked from “low” to “best” for each asset

Responsive Display Ads Best Practices
Here are some best practices to consider to get the most out of the new responsive display ads, based on similar best practices for responsive search ads.
1. Provide as many headlines as possible. The more headlines, the more opportunity there is for more relevant ads, which increases performance.
2. Try highlighting additional product or service benefits and features, a problem you’re solving, or highlight shipping and return information.
3. Try creating headlines of different lengths. Don’t try to maximize the character count in every headline.
4. Add at least 2 distinct descriptions.
5. Create a feed for the products that you wish to use for dynamic remarketing.
6. You can build and upload your own ads outside of Google Ads by uploading with your assets with a .zip file.
“Advertisers should make sure they replace any legacy, non-responsive dynamic ads with responsive display ads, so they don’t miss out on impressions once these ad formats stop serving.“

-Caroline Rice, Retail Search Manager at CPC Strategy
How to Create a Responsive Display Ad
Here’s how to get started with creating your own responsive display ads, as per Google’s support page.
Note: responsive display ads are not yet released to all advertisers.
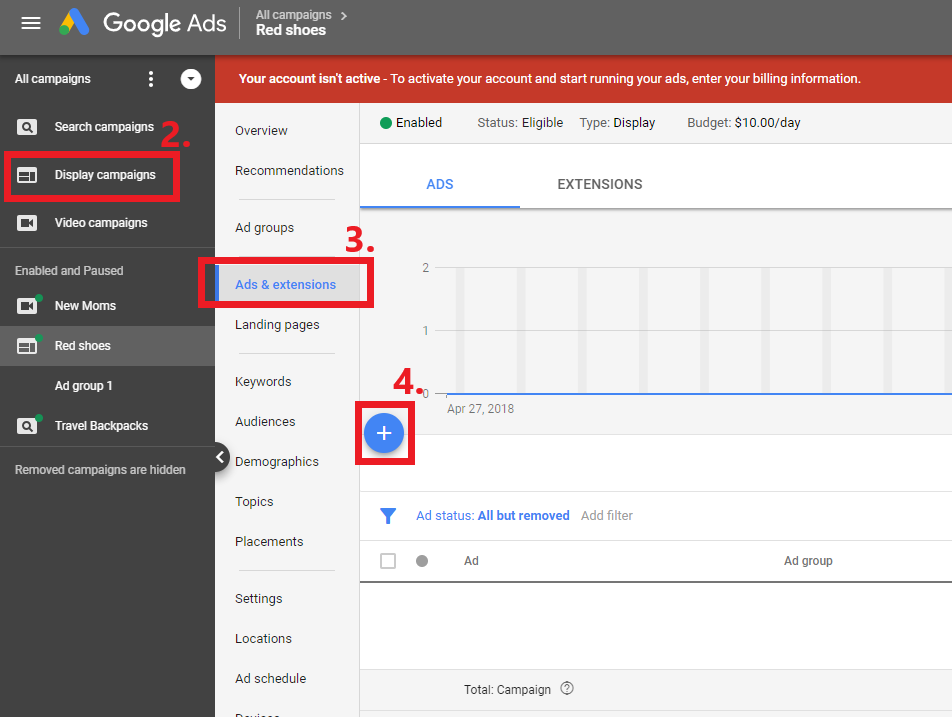
1. Log in to Google Ads.
2. Select Display campaigns from the left panel.
3. Click Ads & extensions.
4. Select the blue plus button .

5. Select Responsive display ad
6. Select an ad group (if you want your RDAs to support dynamic remarketing, make sure your ad group or campaign is attached to a feed).
7. Upload your images and logos.
8. Add your headlines and descriptions.
9. Preview and save.
10. It should take a week for approval before you can review your performance.
Want to learn more about the Google Display Network and Google Ads?
How To Create & Capture Demand Using Our Google Display Network Audience Targeting Method
Google Display Network Remarketing: How To Drive Sales & Promote Customer Loyalty
Google’s New Responsive Search Ads | How They Work and Best Practices
Q4 Google Shopping Best Practices and Advanced Strategies
You Might Be Interested In


