How to Set Up AdWords Social Annotations

For more info on different kinds of AdWords extensions, check out our Retailer’s Guide to AdWords Extensions.

In the rare event where your company page does have solid engagement on Google+, social annotations are a no-brainer. At face value, they’re a nice addition to your ads because they show the shopper that you have an active and well-liked brand by providing social proof. Right off the bat, there are a couple notes about social annotations you should know:

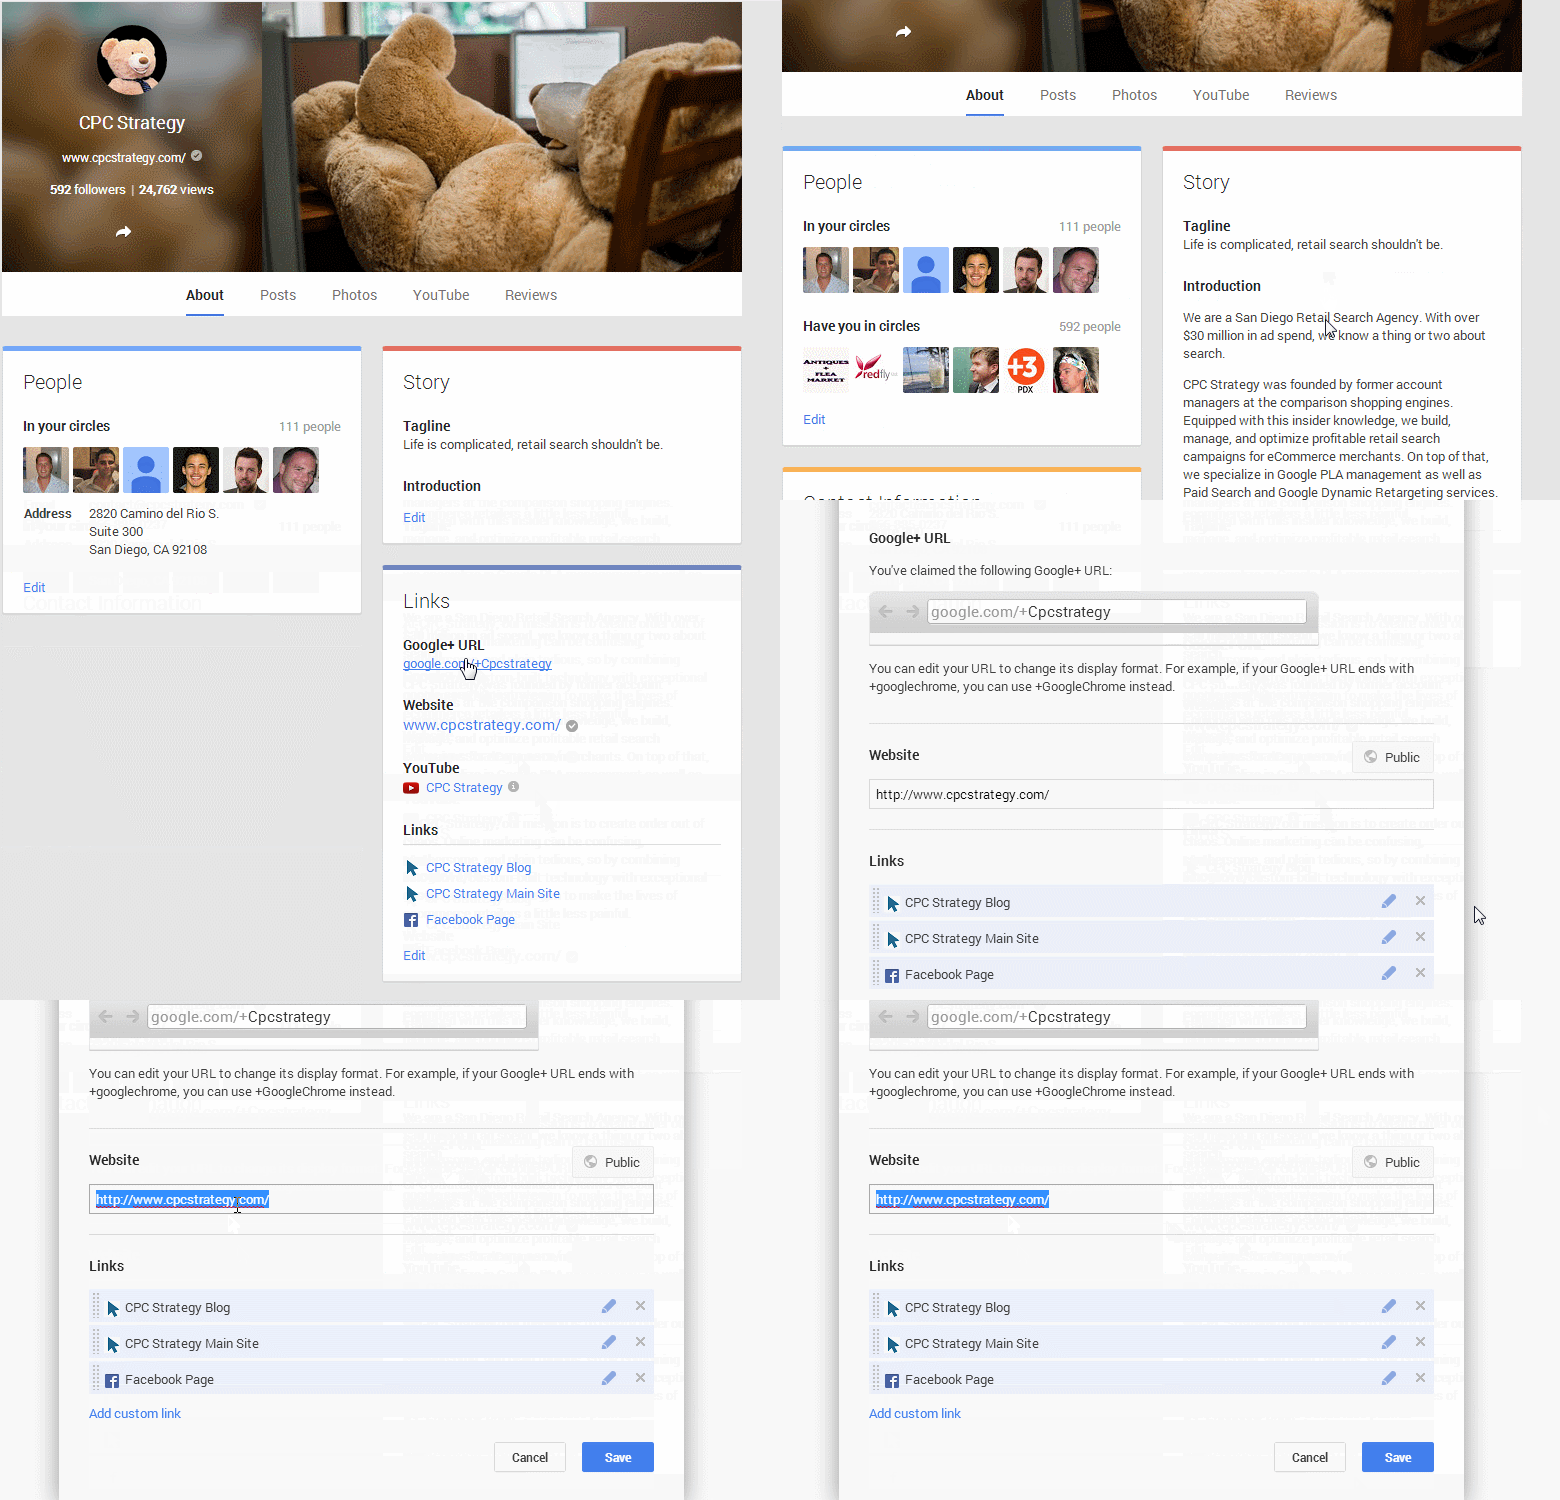
Given that you already have a Google+ page for your company and that you meet those minimum requirements (~100+ followers and recent, shared content), the first and only step is to link your Google+ page with your actual website URL. You do this by simply going to your Google+ page and editing your site URL here:

After you do this, you must either verify this URL in Google Webmaster Tools (given your site is already verified in Webmaster Tools) OR manually add the code to your site backend. This latter option requires you to add a code snippet in the <head> tag of your home page. Google notes that code should look like this:
![]()
If you already have all of this set up, then social annotations will automatically start to populate your AdWords text ads throughout the Search Network. However, based off your AdWords Extensions performance reports, if you feel like social annotations don’t add much value to your ads and potentially take away space for other, more influential AdWords extensions, you have the option to opt-out of automatic social annotations.
Check back for more setup and strategy best practices for other AdWords Extensions, or view our overview of the 9 different AdWords Extensions here.
